Creating a Cloud Project in DaVinci Resolve
Once you have created a Blackmagic Cloud project library, you can begin adding DaVinci Resolve cloud projects.
To create a DaVinci Resolve Cloud Project:
- Open DaVinci Resolve, sign in to your Blackmagic Cloud account and select the profile that contains your Blackmagic Cloud project.
-
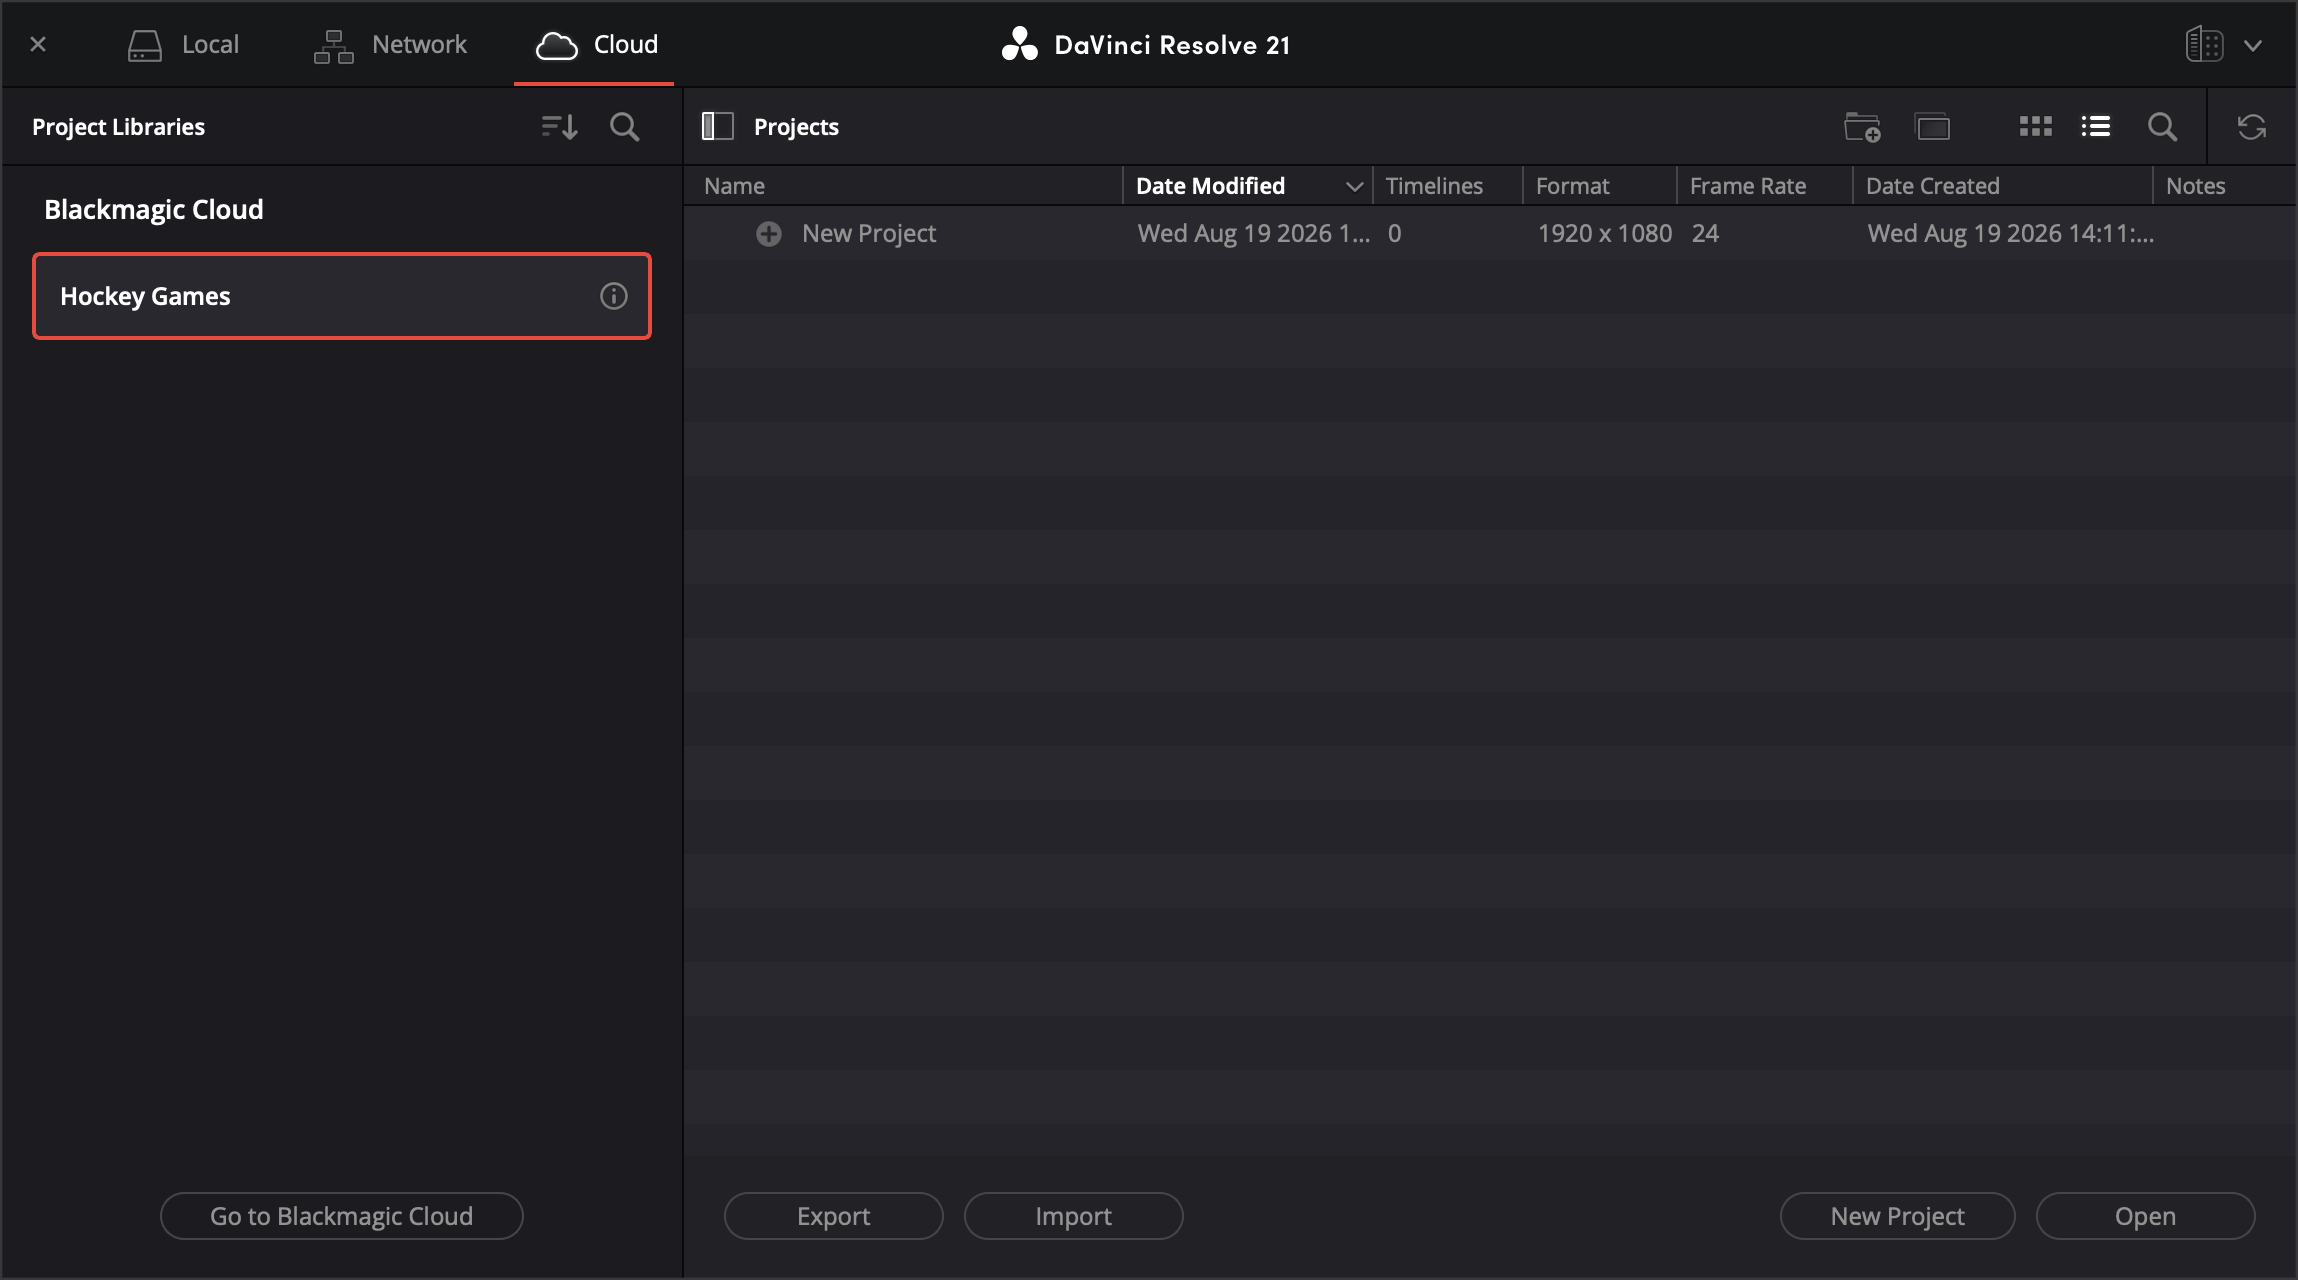
In the ‘project manager’ window, select ‘cloud’. Your Blackmagic Cloud project libraries will be displayed in the ‘project libraries’ panel. Click on the project library where you would like to create a new project and click the ‘new project’ button.
-
The ‘create new cloud project’ window will open. Inside this window you will find the following settings.
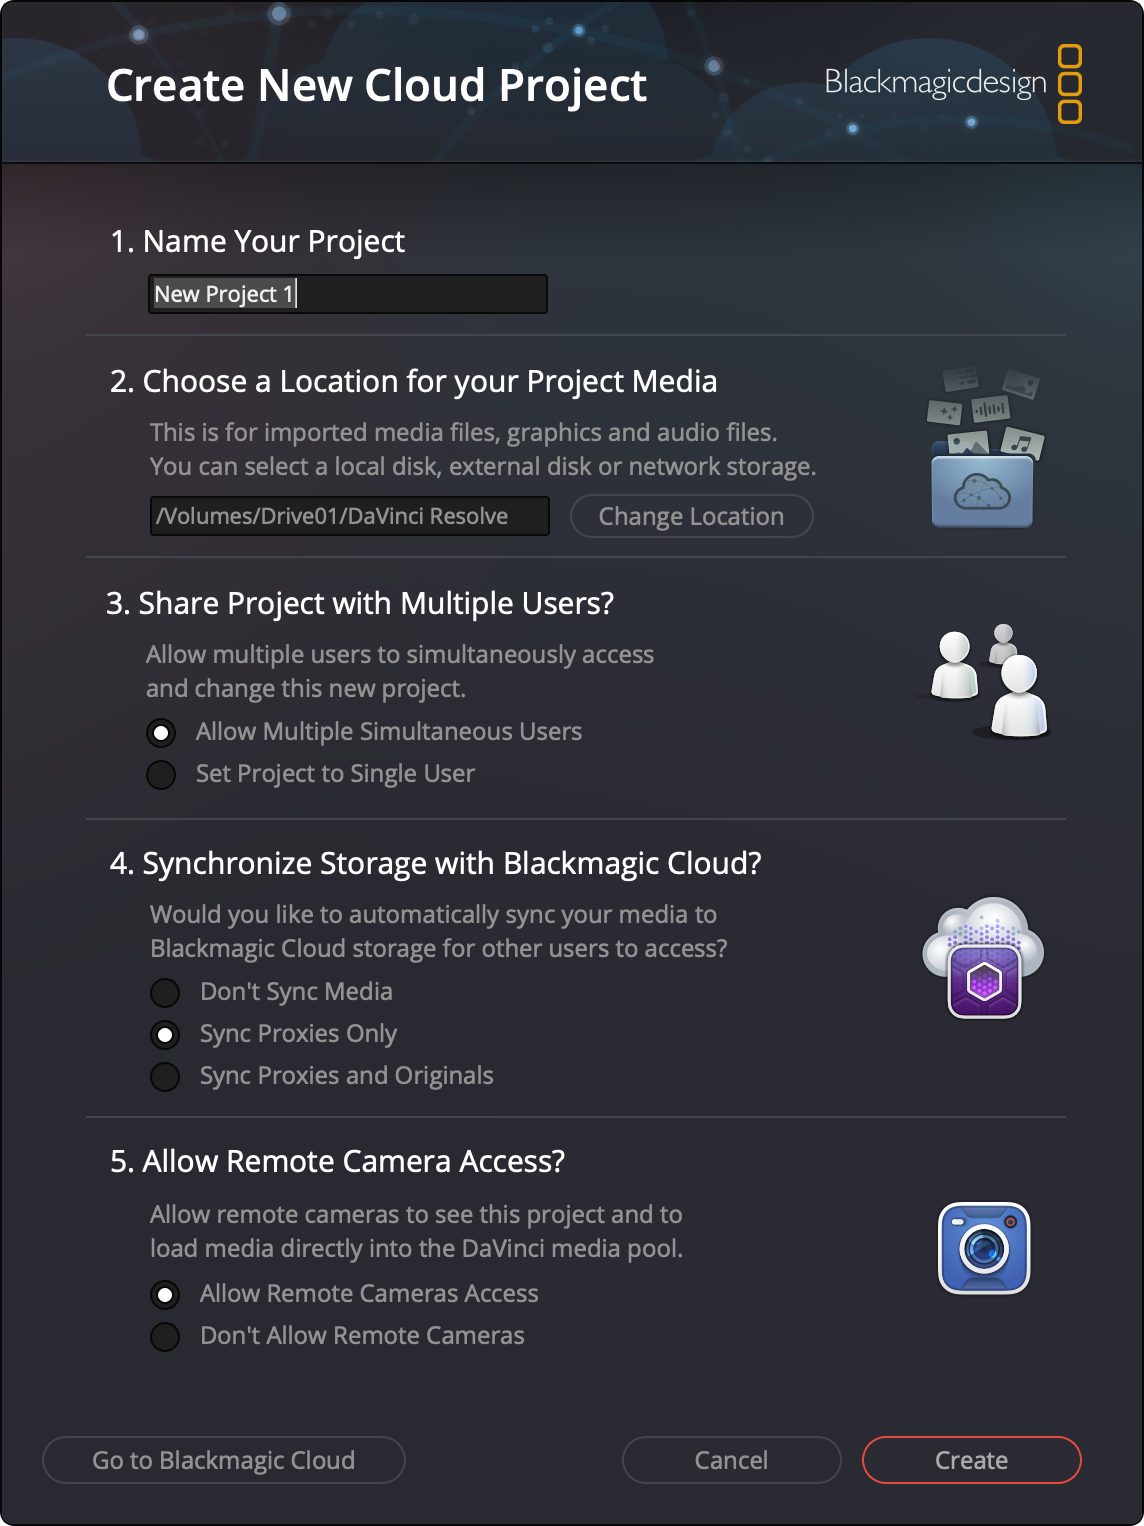
Name Your Project
Give your project a suitable name.
Choose a Location for your Project Media
Choose a location on your computer for any imported media files, graphics or audio files that you want to use in your project.
Share Project with Multiple Users
Select ‘allow multiple simultaneous users’ to let multiple people access the project at the same time. This option will enable DaVinci Resolve’s collaboration mode. For more information on collaborating in DaVinci Resolve, refer to the ‘collaborative workflow’ section of the main DaVinci Resolve manual.
Selecting ‘set project to single user’ will disable collaboration mode and only allow a single user to access the project at any time.
Synchronize Storage with Blackmagic Cloud
These options let you choose what media is uploaded and synced to your Blackmagic Cloud storage.
- Don’t Sync Media: Choose this option if you do not want to upload any media to Blackmagic Cloud storage. This will mean that any media you import in to the project won’t be available to other users.
- Sync Proxies Only: This option will upload proxy media created by DaVinci Resolve to your Blackmagic Cloud storage. This is a good solution for a shared project and will allow proxy versions of media imported by one user to be made available to all collaborators.
- Sync Proxies and Originals: Choosing this option will upload both proxies and original media to your Blackmagic Cloud storage. This can use a large amount of storage space depending on the amount and size of the original media.
Allow Remote Camera Access
If you want to allow remote camera access from compatible Blackmagic Design cameras, choose ‘allow remote camera access’. This will allow members of this project to upload media directly to Blackmagic Cloud storage and add it to the project’s media pool. If you don’t won’t to allow remote camera access, select ‘don’t allow remote cameras’.
- Click the ‘create’ button to create your DaVinci Resolve cloud project.
After you have created a DaVinci Resolve cloud project you can change any of the cloud project settings in DaVinci Resolve by opening the ‘Blackmagic Cloud’ tab in ‘project settings’.
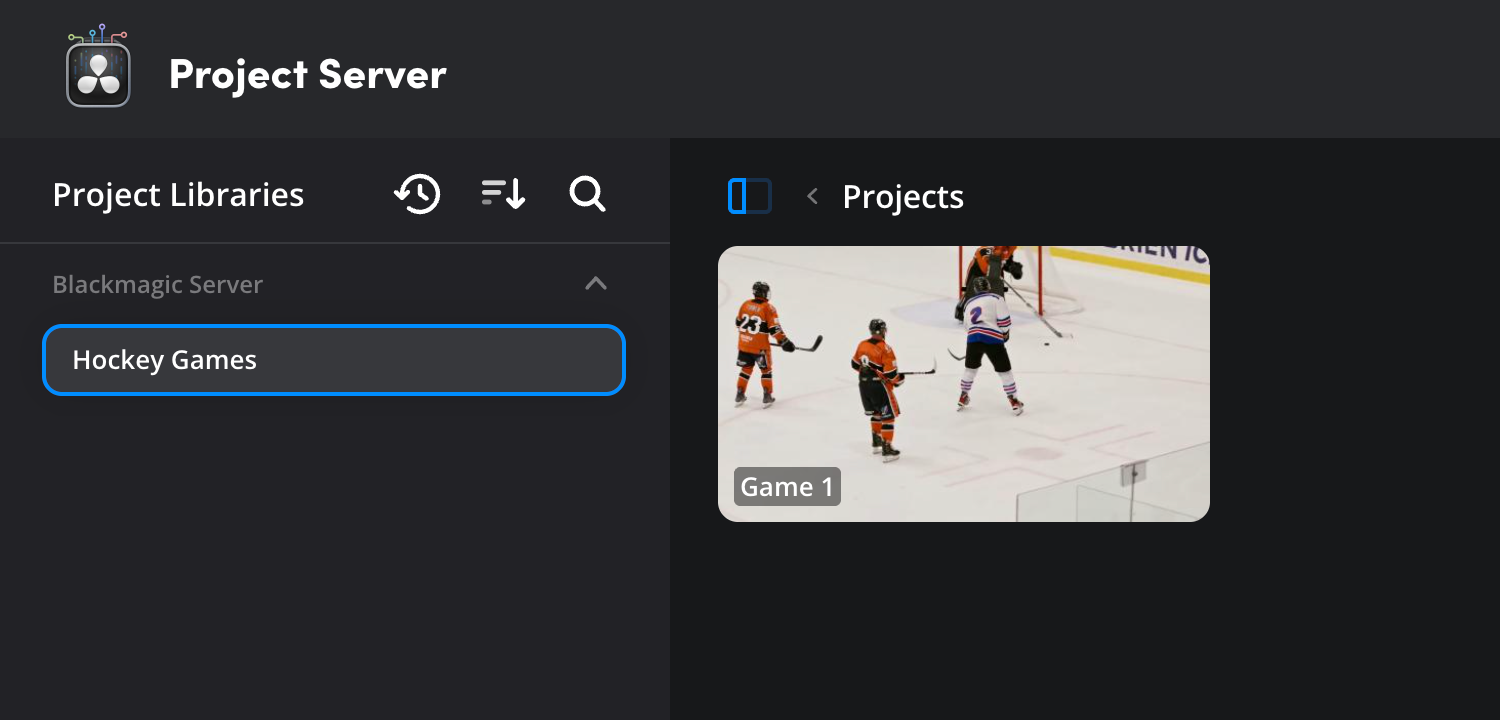
Once you have created a DaVinci Resolve cloud project, it will be displayed in the ‘projects’ panel on the ‘project server’ page in your Blackmagic Cloud account.